
Connections
Connections represent credentials and configuration used to access integrations on behalf of your customers.
They have the following properties:
| Property | Description |
|---|---|
id | Unique identifier of the connection. |
name | Name of this connection. It can be set by you when creating the connection or assigned automatically. |
integrationId | Identifier of the integration connection is created for. |
authOptionKey | If integration offers multiple authentication options, this property will contain the key of the selected option. |
parameters (secret) | Connection parameters provided by the customer when creating the connection. |
credentials (secret) | Credentials required to access the external API. |
connectorParametres (secret) | Connector parameters provided by the integration at the time of connection creation. |
disconnected | Set to true if connection was disconnected (cannot be used to make API requests). |
error | Contains error details if connection is disconnected. |
nextCredentialsRefreshAt | Timestamp when credentials are scheduled to be automatically refreshed (if auto-refresh is enabled). |
nextRetryTimestamp | Timestamp when next reconnection attempt is scheduled (if connection is disconnected). |
retryAttempts | Current retry attempt count (0-10) for auto-reconnect. |
Creating Connections
We recommend using Connection UI implemented with our drop-in components or Javascript SDK.
Use the flow below only when you know what you are doing.
To create a new connection or refresh credentials for an existing connection, follow the steps described below.
They work in the same way for every connector regardless of the app that is being connected.
Connector Auth Spec
You can get information about how authentication works in a given connector from its specification. Look for the following fields:
auth.type- type of authentication supported by the connector. Possible values are:client-credentials- Authentication based on credentials user enters in the UI.oauth1- OAuth1 authenticationoauth2- OAuth2 authentication
ui- information about what to display user in the UI when authenticating.
Authentication Flow
To authenticate a user you need to do the following:
- Collect connection parameters from the user. They need to match
ui.schema. - Redirect user to
https://api.integration.app/connectURL with the parameters described below. Ifauth.typeisclient-credentials, you can open this URL in a hidden iframe. If not, you need to open it in a new window visible to the user.
Add the following query parameters to the URL:
- token - your customer's Access Token
- requestId - a unique id of this authentication request. It will be used in the callback to separate callbacks from different requests. Note: providing this parameter will result in window being closed after connection is created. If you want it to behave differently (for example, redirect to another URL), you cannot use this parameter.
- integrationKey - key of the integration you want to authenticate against.
- connectionId (optional) - id of the connection you want to refresh credentials for (if you want to do it for a specific connection)
- connectionParameters (optional) - parameters provided by user in the connection UI, JSON-encoded.
Custom Callback URL
In some cases you need to use a custom Callback URL instead of standard https://api.integration.app/oauth-callback. These situations include:
- When you need to approve your app and callback URL needs to be on your domain (for example, Google requires that).
- You want to create a custom installation logic for some application stores (for example, Pipedrive app installation flow).
- When you want to do any other custom handling of oAuth callback.
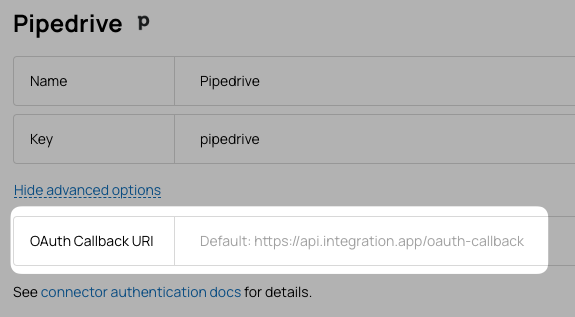
You can set custom callback URI in the integration settings. It will be used for all connections created for this integration.
After handling the callback URI, you need to redirect user to https://api.integration.app/oauth-callback URL with the same query parameters you received in the callback URI.
For example, if you use callback url https://myapp.com/oauth-callback and a third-party application sends user to the following URL:
https://myapp.com/oauth-callback?code=abcd&state=1234
when you are done with the user, you need to redirect them to:
https://api.integration.app/oauth-callback?code=abcd&state=1234
Custom State
For OAuth2 connections, you can add a custom component to the state parameter used in the callback URI. This can be useful if you want to pass some information through the authentication process.
To do this, simply add customState query parameter when opening the https://api.integration.app/connect URL like this:
https://api.integration.app/connect?customState=MY_CUSTOM_STATEWhen the user is redirected to the callback URI, the state parameter will contain the value of customState parameter after : symbol like this:
https://myapp.com/oauth-callback?code=abcd&state=1234:MY_CUSTOM_STATEAuth from outside of integration.app
When connection is initiated outside of Membrane (for example, from an app store of a third-party application),
you need to add the following additional query parameters when redirecting user to integration.app:
tokenis Integration.app Token you normally use to access our API or SDK.integrationis id or key of the integration you want to authenticate against (i.e.hubspotorsalesforce).redirectUriis the URL you want to redirect user to after connection is created. This could be a page in your app you want the user to end up on.
For example, if you use callback url https://myapp.com/oauth-callback and a third-party application sends user to the following URL:
https://myapp.com/oauth-callback?code=abcd
when you are done with the user, you need to redirect them to:
https://api.integration.app/oauth-callback?integration=pipedrive&code=abcd&token=AUTH_TOKEN&redirectUri=https://myapp.com/configure-integration
After user's connection is successfully created by Membrane, the user will be redirected to https://myapp.com/configure-integration URL.
If redirectUri is not provided, integration.app will simply close the window after connection is successfully created.
If connection creation fails, user will be redirected to your redirectUri with error parameter like this:
https://myapp.com/configure-integration?error=ERROR_MESSAGE
Secrets
credentials, parameters, and connectorParameters are encrypted at rest and are not returned with the connection object by default.
To get these values, you should add includeSecrets=true to the query parameters of your request to get a single connection.
This request must be made using workspace admin access token.
Token Refresh
Membrane refreshes credentials such as OAuth tokens and sessions both proactively and reactively.
Auto-Refresh
When credentials include an expiration time, Membrane schedules automatic refresh before the token expires. The nextCredentialsRefreshAt field shows when the next refresh is scheduled.
Error-Based Refresh When an API request fails due to an expired token, Membrane automatically attempts to refresh the token and retries the request. If the request fails again after refresh, the connection is marked as disconnected.
Refresh Locking Membrane uses locking to ensure only one refresh happens at a time for each connection, even when running multiple server instances.
After Refresh On success, new credentials are stored and the next auto-refresh is scheduled. On failure, the connection is marked as disconnected and auto-reconnect is triggered (if available).
Auto-Reconnect
When a connection is marked as disconnected and the connector has a test method implemented, Membrane automatically attempts to reconnect with exponential backoff.
Retry Behavior Membrane periodically runs the connection test. The time between retries increases with each failed attempt. After a maximum number of attempts, retries stop and the connection remains disconnected until manually reconnected.
You can view retry status in the nextRetryTimestamp and retryAttempts fields on the Connection page in the console.
Successful Reconnect When a retry succeeds or any API request returns a successful response, the connection is automatically marked as reconnected and all retry data is cleared.
Auto-reconnect due to activity If you attempt to use a disconnected connection to make an API request, directly or indirectly (i.e. by running an Action that uses the connection), Membrane will attempt to use the connection despite its disconnected state. If the attempt succeeds, the connection will be marked as reconnected.
Connection Lifecycle Webhooks
You can subscribe to webhook notifications for connection lifecycle events. The following events are available:
connection.created- triggered when a connection is created and credentials are set (if connection is created without credentials, this webhook will not be fired until credentials are set for the first time)connection.deleted- triggered when a connection is archivedconnection.disconnected- triggered when a connection is marked as disconnectedconnection.reconnected- triggered when a connection is marked as reconnected
Updated about 14 hours ago